
Vision Plus Sliding Door Will Not Lock or Handle Will Not Engage
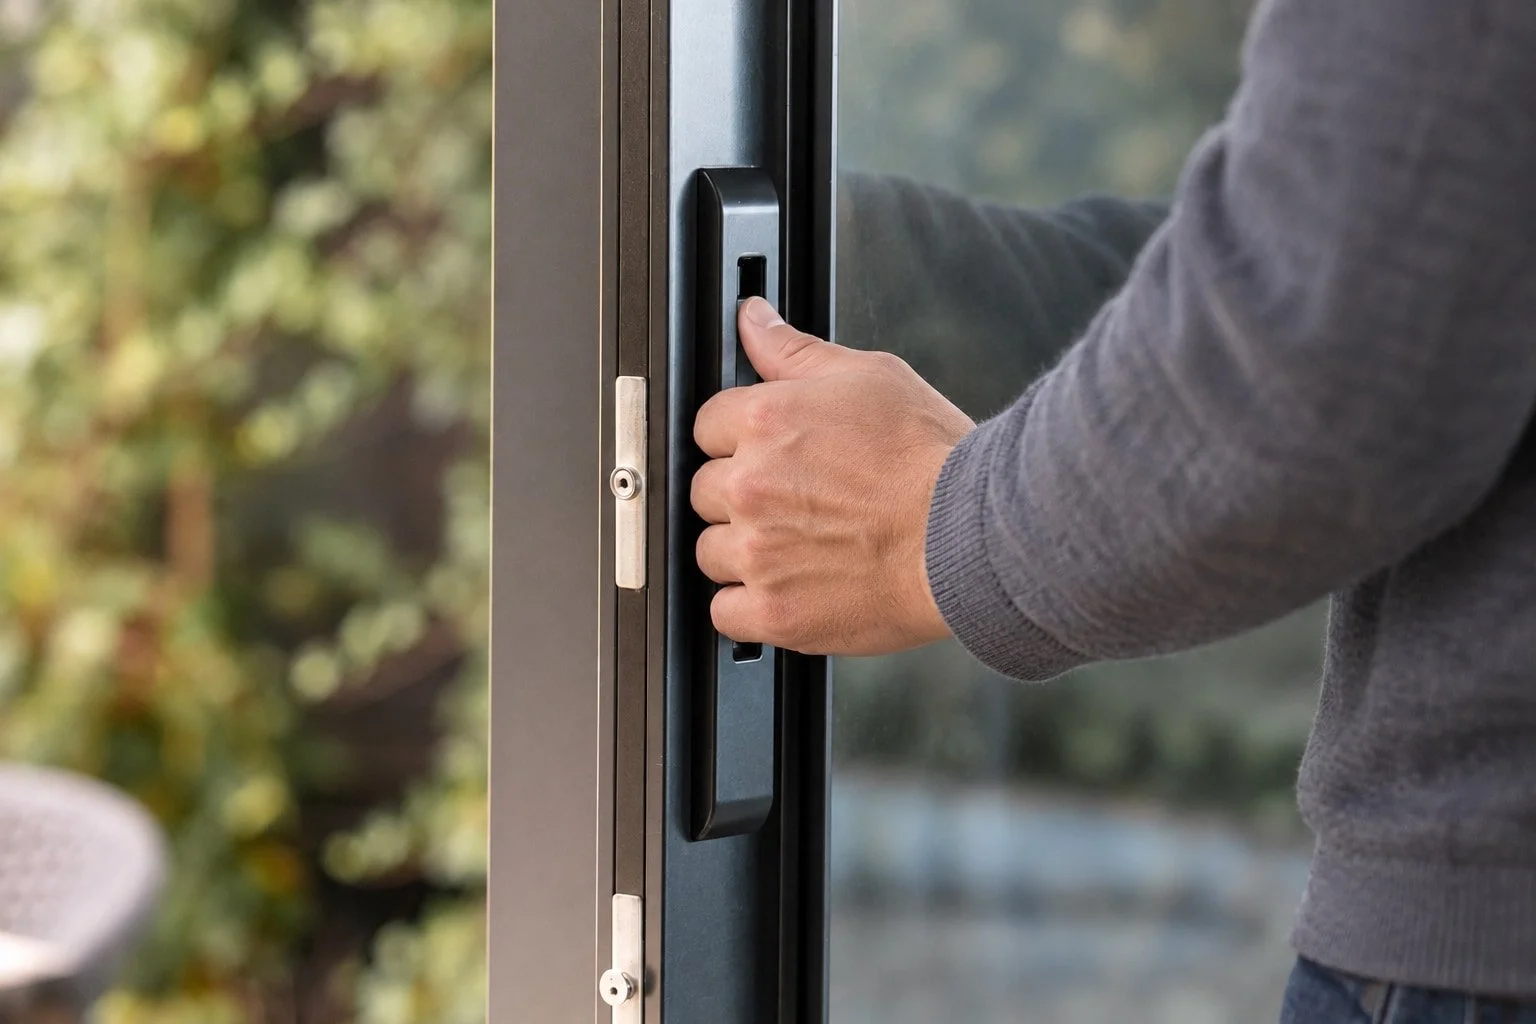
Applies to: Vetrina Vision Plus sliding doors equipped with 3-point or multi-point locking hardware.
A Vision Plus sliding door that closes but will not lock is usually experiencing one of three conditions: the locking points are no longer aligned with the frame keeps, the door panel has shifted slightly and needs adjustment, or the handle is no longer properly engaging the internal locking mechanism.
The troubleshooting process below helps you determine which condition you are dealing with before replacing parts or performing more extensive service.
Do Not Force the Handle
If the lever becomes unusually difficult to move, stop before applying excessive force.
Forcing the handle can damage the gearbox, internal connecting rods, hooks, or other locking components. A difficult handle often indicates that the locking points are meeting resistance rather than entering the frame keeps correctly.
Start by testing the locking mechanism with the sliding panel open.
Step 1: Test the Lock With the Door Open
Open the sliding panel far enough that the locking hooks or bolts are clear of the frame. Operate the interior lever as if you were locking the door.
If the locking points operate normally
If the hooks or bolts extend and retract normally while the door is open, the locking mechanism itself is probably functioning.
The problem is more likely an alignment issue between the sliding panel and the frame keeps or strike plates.
Proceed to the alignment checks below.
If the locking mechanism does not move
If the handle:
Feels unusually loose
Moves without resistance
Spins or travels farther than normal
Does not move the locking hooks
Does not return normally after operation
The issue may be within the handle connection, spindle, internal connecting rod, or gearbox.
Skip ahead to Inspect the Handle and Internal Mechanism.
Step 2: Inspect the Track and Locking Area
Before making any adjustments, inspect the door for anything physically preventing normal operation.
Check the:
Bottom track
Head track
Interlock area
Frame keeps
Locking hooks or bolts
Drainage areas
Remove dirt, gravel, construction debris, or other material that could interfere with the panel or locking hardware.
Moving hardware should be kept clean and periodically inspected. Vetrina recommends removing dirt and debris from locking points, rollers, hinges, and other moving hardware before lubrication or adjustment.
After cleaning, close the panel and test the lock again.
Step 3: Check the Alignment of the Locking Points
Slowly bring the sliding panel into the closed position while observing where the hooks or locking points meet the frame keeps.
The hooks should enter the keeps without having to push, lift, or force the door into position.
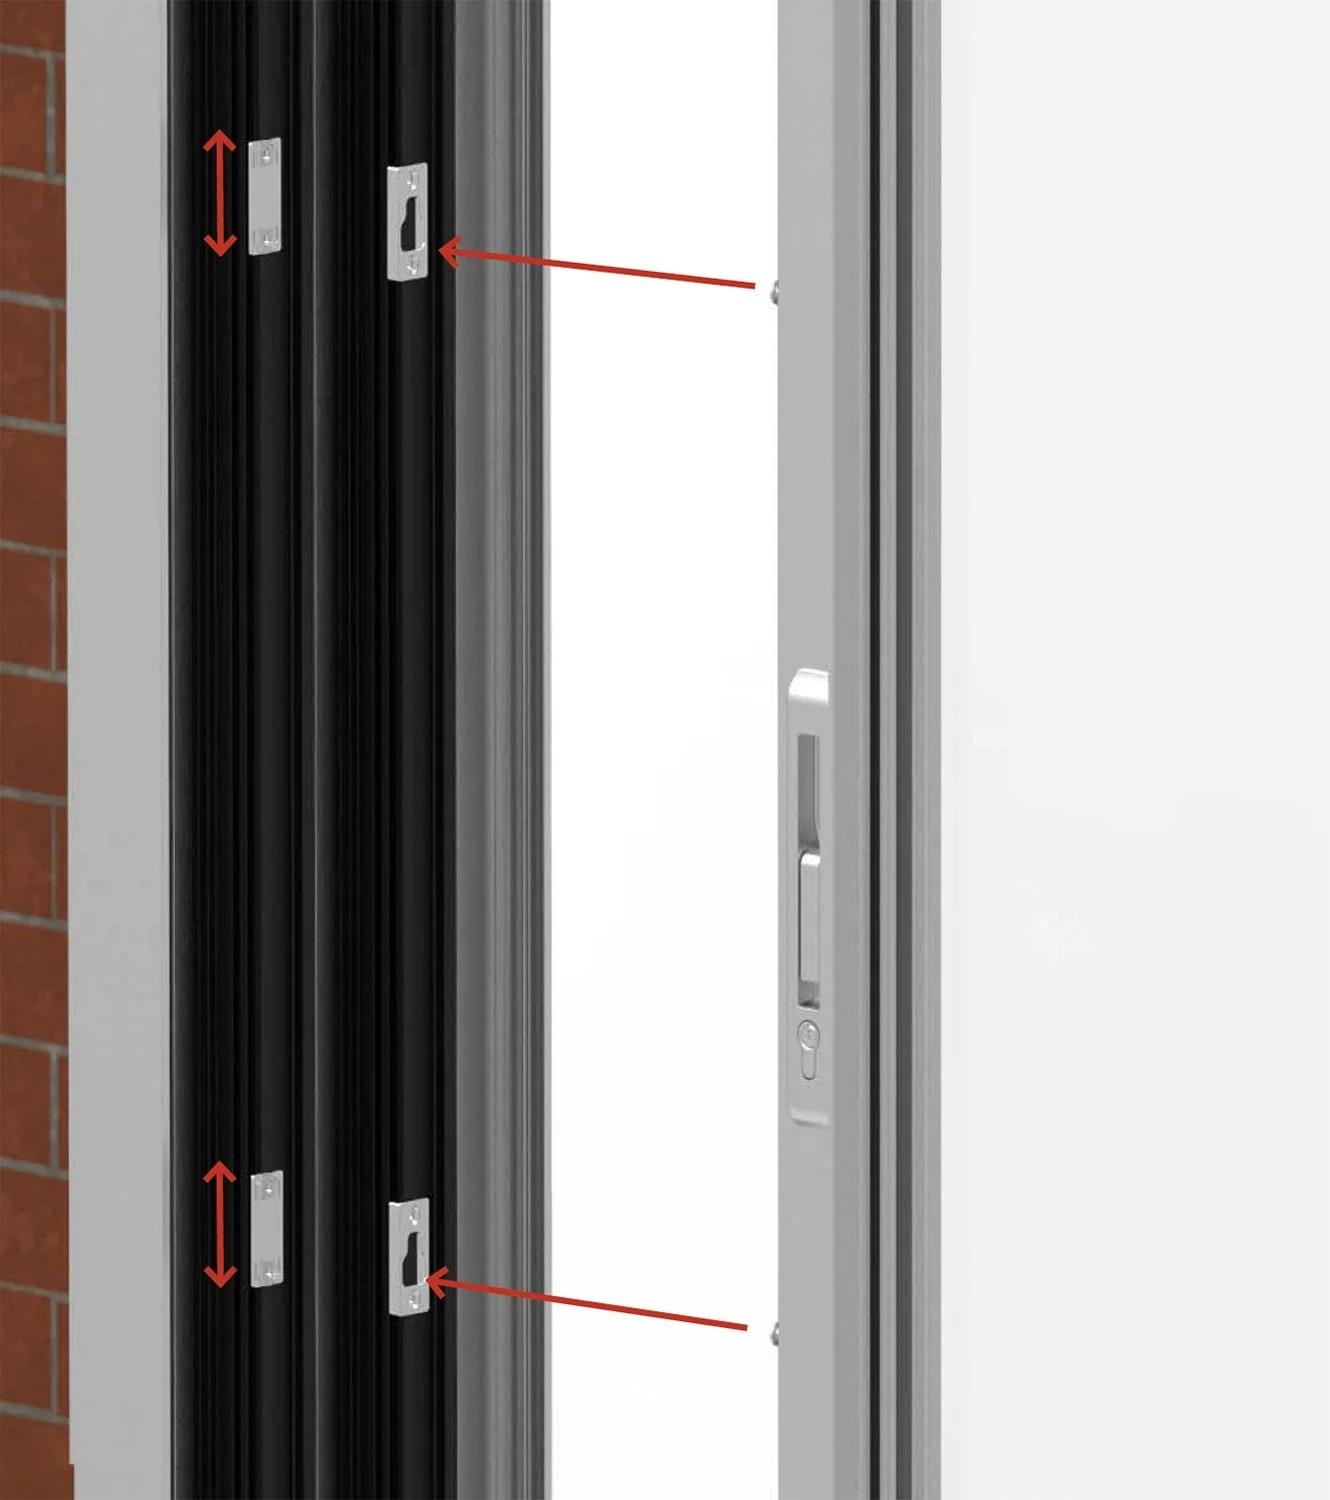
On aluminum systems, Vetrina allows the locking keeper or strike plate to be repositioned within its permitted adjustment range. Adjustments should be made one locking point at a time while confirming that the handle remains smooth, all locking points fully engage, and the panel remains correctly aligned.
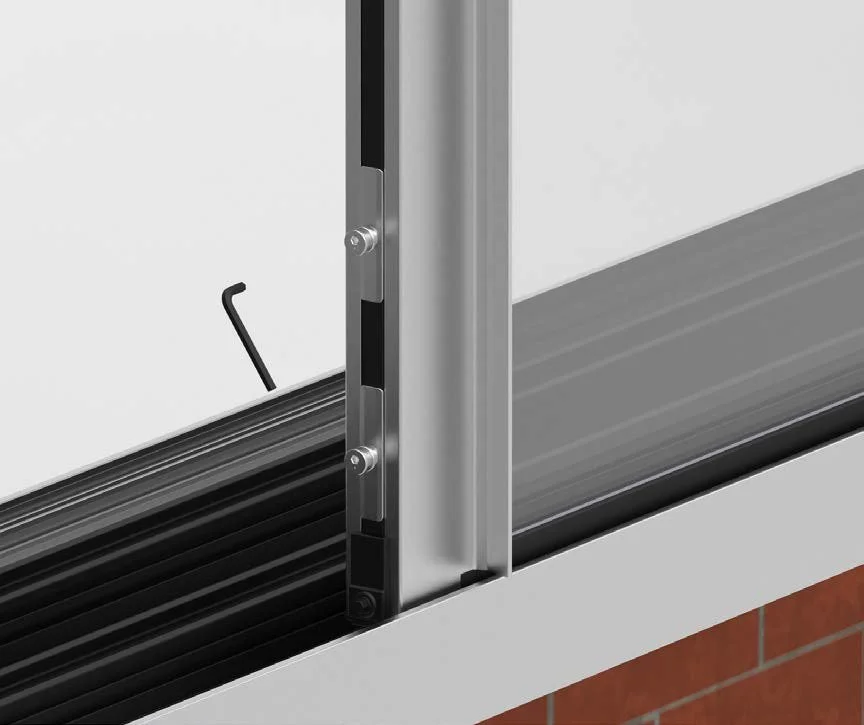
Use an Allen key to adjust the locking points
Signs of misalignment include:
The handle locks only when the panel is pushed inward
The panel must be lifted slightly before the handle will move
A locking hook strikes the top or bottom of its keep
One locking point engages while another does not
The handle begins to move but stops partway
Step 4: Adjust the Frame Keeps if Necessary
If a hook is slightly above or below its corresponding keep, the keep may require minor repositioning.
Depending on the hardware configuration, loosen the keep screws only enough to allow movement and shift the keep slightly to align with the locking point.
Make small adjustments only and retighten the fasteners securely before testing.
Do not move every keep at once. Adjust the affected locking point, test the system, and then continue only if another point also requires correction.
The goal is not to make the door lock as tightly as possible. Excessive locking pressure can make the handle difficult to operate and place unnecessary stress on the hardware and gaskets. Vetrina's general aluminum-hardware guidance likewise recommends maintaining smooth handle operation and full locking engagement without binding.
Step 5: Check Whether the Sliding Panel Has Dropped
Large sliding panels carry substantial glass weight. Over time, installation settlement or adjustment changes can cause the panel to sit slightly lower than its original position.
A dropped or uneven panel can cause the locking hooks to no longer align with the frame keeps.
Signs that the panel had dropped: uneven gaps, rubbing at sill, hooks below keeps, harder locking.
Look for:
Uneven gaps around the panel
One end of the panel sitting lower than the other
The panel rubbing against the sill or frame
Locking hooks consistently sitting below their keeps
Increased effort when sliding the panel
Where the applicable sliding system provides roller-height adjustment, the rollers may be used to restore the panel to the correct position.
Adjust gradually and repeatedly check both panel movement and lock alignment.
If substantial adjustment is required, the overall installation geometry should also be checked. Hardware adjustment should correct minor alignment conditions, not compensate for a frame that is significantly out of level, square, or plane.
Step 6: Inspect the Handle Connection
If the handle moves but the locking mechanism does not respond correctly, inspect the handle assembly.
Remove the interior handle trim carefully and check:
Handle mounting screws
Spindle connection
Grub/set screws
Visible connecting components
A loose grub screw or spindle connection may allow the handle to move without fully operating the locking mechanism. Tighten loose fasteners only as necessary and test the handle again. Do not overtighten screws into aluminum profiles or hardware components.
When the Problem May Be Inside the Gearbox
If the handle connection is secure but the hooks still do not move normally, the problem may be inside the concealed locking mechanism.
Possible internal conditions include:
Disconnected connecting rod
Slipped linkage
Broken spring
Damaged gearbox
Stripped internal component
Damaged locking hook assembly
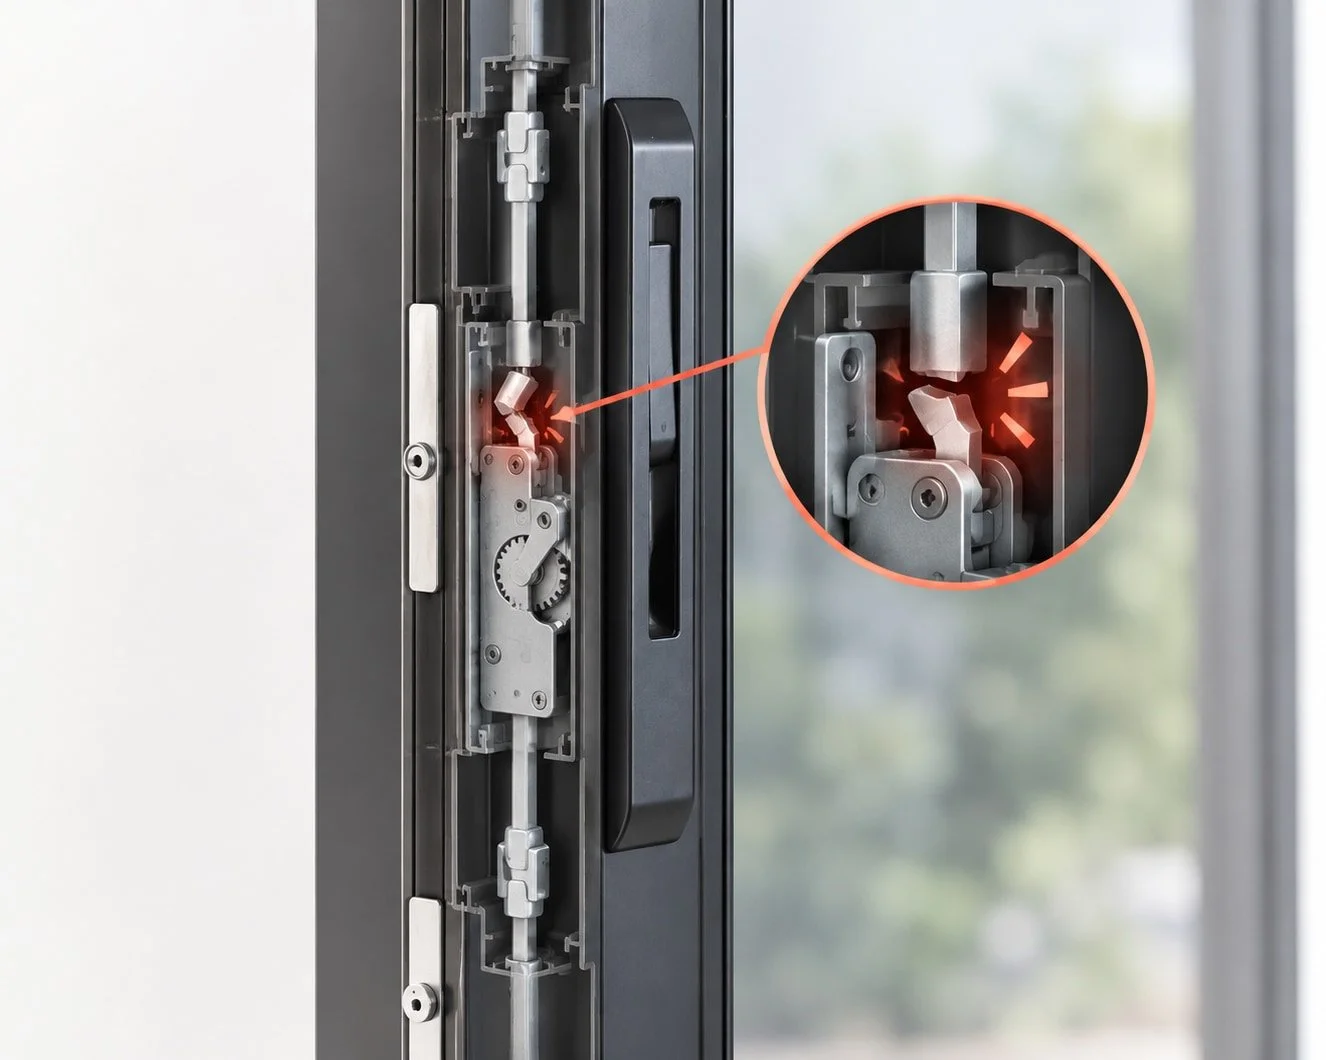
These components are concealed within the door profile and generally require more extensive disassembly than a basic alignment adjustment.
If the handle moves freely with little or no resistance but none of the locking points respond, an internal hardware problem becomes more likely.
A Useful Diagnostic Shortcut
One of the fastest ways to narrow down the problem is:
Door open + lock works normally → likely alignment problem
Door open + lock still does not operate → likely handle, linkage, or gearbox problem
This distinction can save considerable time before hardware is removed.
What If the Door Is Difficult to Slide Too?
If the door is difficult to move and difficult to lock, first investigate the panel alignment and track condition.
A panel that is sitting incorrectly on its rollers can affect both sliding movement and the position of the locking points.
Do not solve a sliding problem by moving the locking keeps repeatedly. Correct the panel geometry first, then make minor locking adjustments if necessary.
When Should You Stop Troubleshooting?
Contact Vetrina rather than continuing to adjust the system if:
The handle rotates freely without operating the lock
A locking hook is visibly damaged
The gearbox makes grinding or clicking noises
A connecting rod appears broken or disconnected
The panel requires substantial height correction
The frame appears out of square
Hardware components are bent or damaged
You are unsure which adjustment point applies to your system
Do not drill, cut, modify, or substitute concealed locking components without confirming the correct replacement part.
Need Help?
If your Vetrina sliding door still does not lock after completing the basic checks above, please contact Vetrina Windows & Doors for assistance.
To help us diagnose the issue quickly, please provide:
Project or order information
Sliding-door model, if known
Photos of the complete door
Close-up photos of the handle and locking points
Photos of the frame keeps
A short video showing the handle being operated with the door open
A second video showing what happens when you attempt to lock the door closed
That last pair of videos is especially helpful because it allows our team to quickly distinguish between an alignment issue and an internal locking-hardware issue.