
Common Window Problems & Troubleshooting
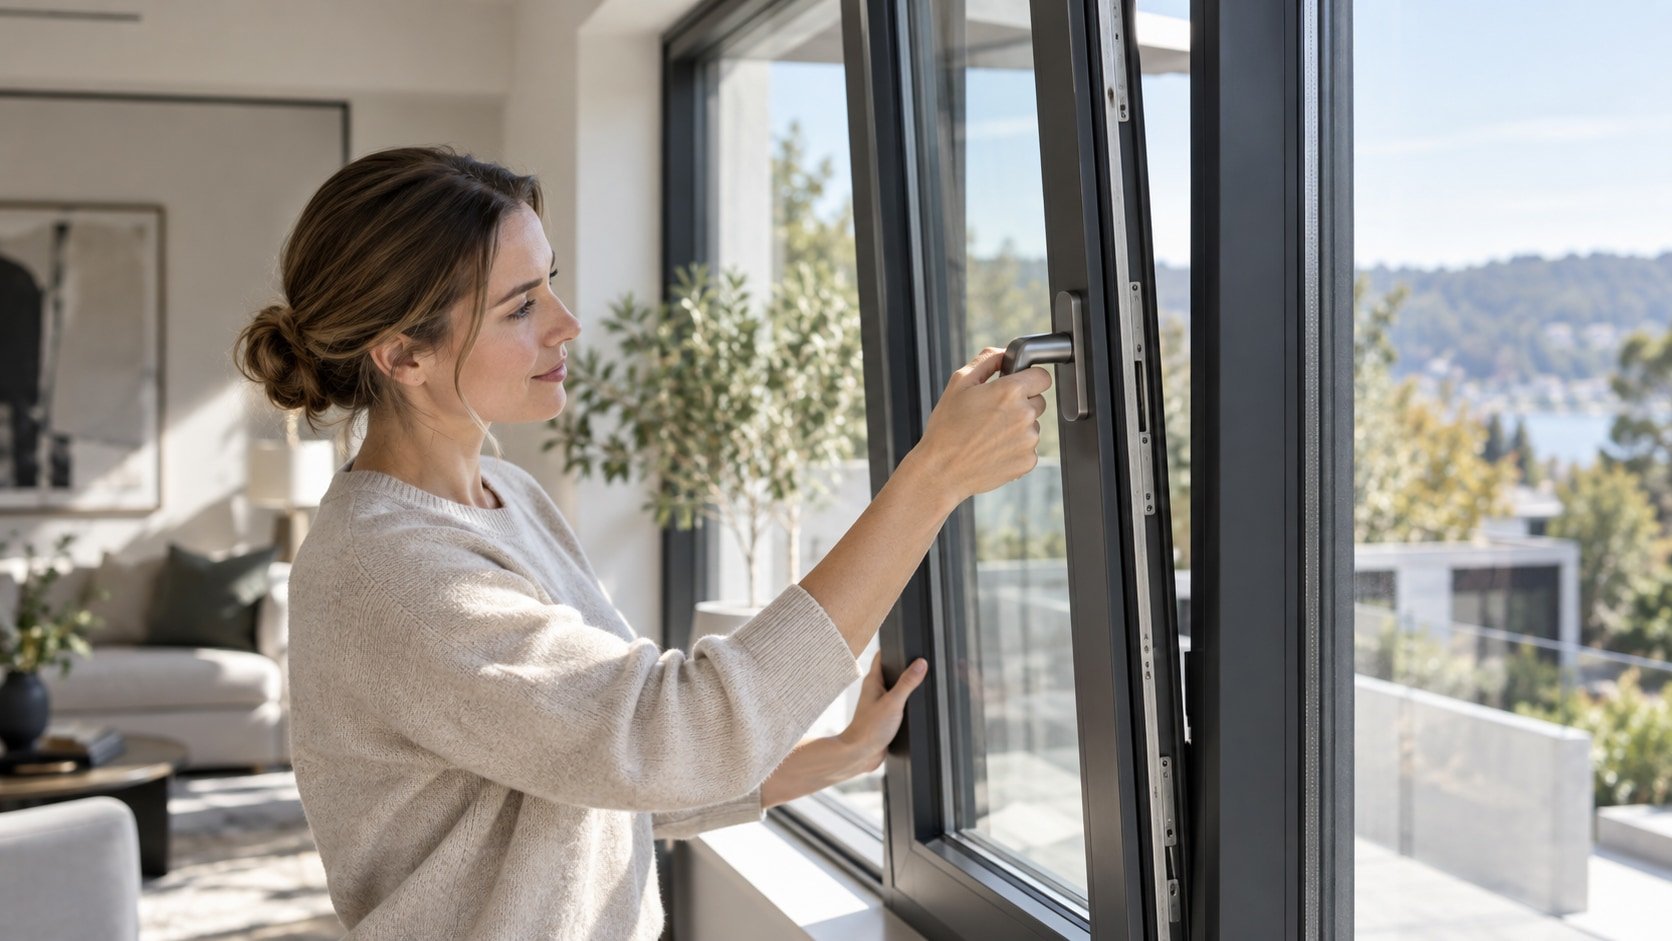
Applies to: Aluminum and uPVC windows.
Vetrina operable windows are designed to open, close, lock, and tilt smoothly when the frame, sash, glazing, and hardware are correctly aligned. If a window becomes difficult to operate, the problem does not necessarily mean that a component has failed. Many operating issues are caused by minor sash alignment, locking-pressure, or hardware adjustments.
Before making any adjustment, identify where the window is binding and what the handle or sash is doing differently than normal.
This guide covers common issues including windows that are difficult to open or close, dropped or dragging sashes, stiff handles, tilt-and-turn windows that become stuck between operating positions, opening limiters, air leakage, water at the sill, and condensation between the glass panes.
Start With a Basic Operation Check
Before adjusting the hardware, open and close the window slowly and observe the sash throughout its full range of movement.
A correctly adjusted window should open and close smoothly, latch without excessive effort, remain properly aligned when tilted, and allow all locking points to engage their keepers without binding. The drainage openings at the sill should also remain clear. We recommend checking the frame alignment first whenever one of these functional checks fails.
Look particularly closely at the gap, or reveal, between the sash and frame. A noticeably wider or narrower gap at one corner can help identify where the sash has shifted.
Hardware adjustment is intended only for relatively minor corrections. If more than about 2 mm of correction seems necessary, check the frame geometry rather than continuing to adjust the hardware.
Window Is Difficult to Open or Close
First determine exactly where the sash is rubbing or binding.
If the sash contacts the frame near the upper corner on the handle side, or the gap is noticeably wider at the top of the opening side than at the bottom, the upper hinge offset may need minor adjustment.
If the sash drags across the sill, sits too low in the opening, or binds at the head while tilted, the sash height may need adjustment at the lower hinge.
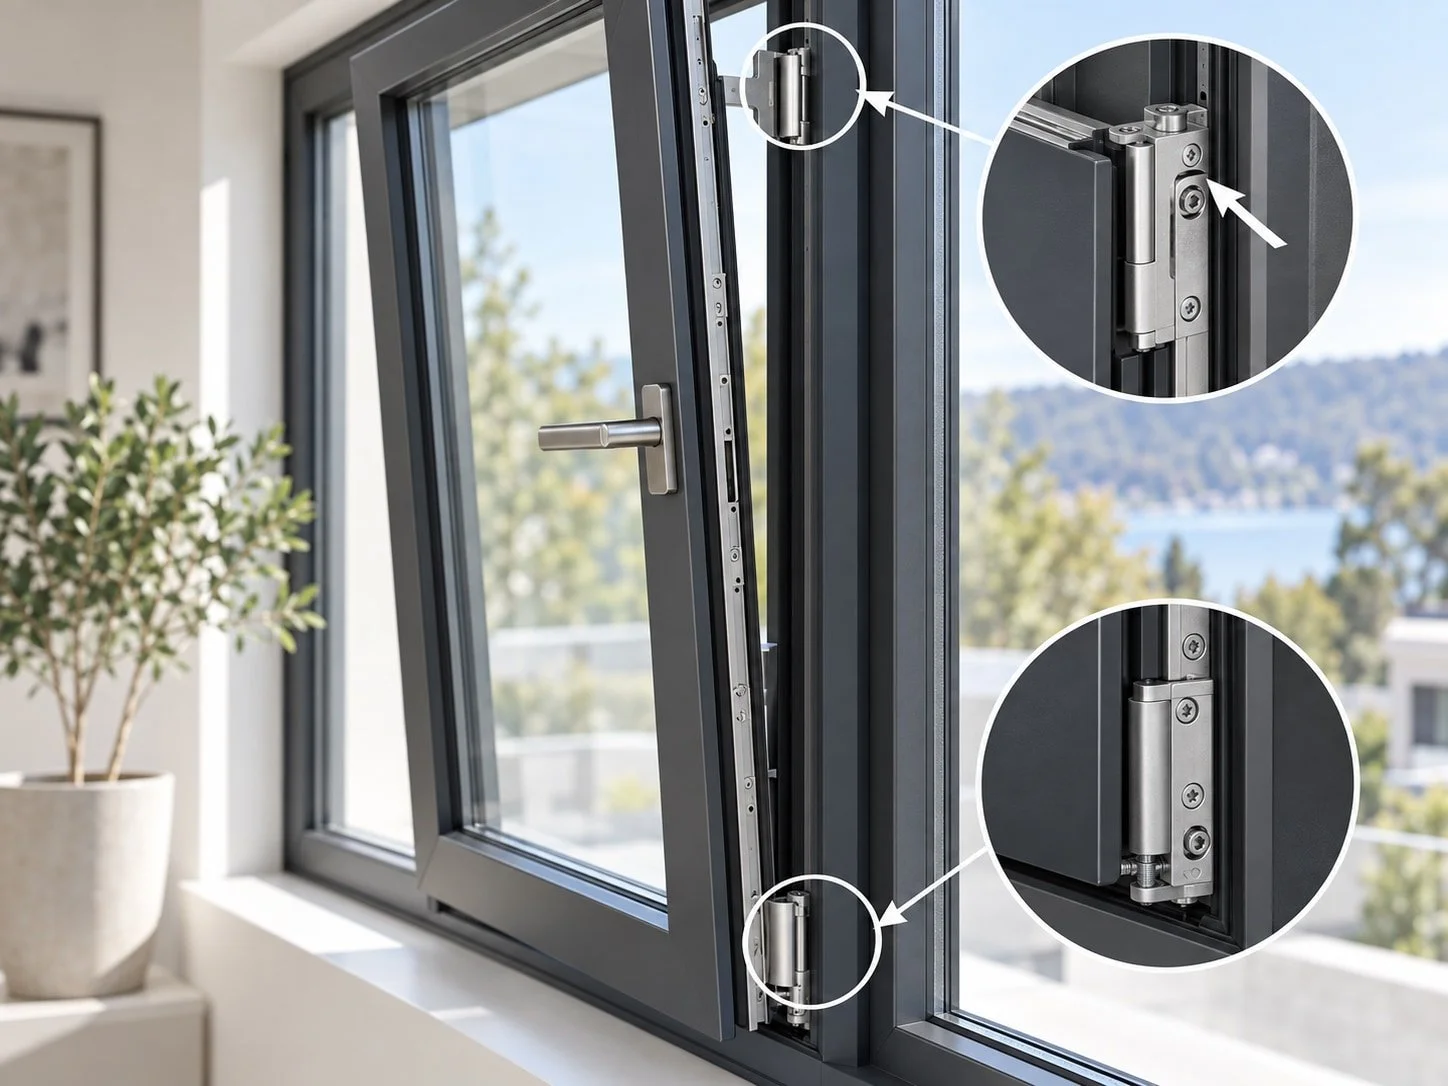
Upper and lower hinges on a tilt and turn window
If the problem occurs at one of the lower corners, you may need to correct the horizontal position of the lower hinge.
Vetrina's hardware needs a 4 mm Allen key for these typical sash-alignment adjustments and calls for small changes with the window retested after each adjustment. The lower-hinge vertical adjustment raises or lowers the sash, while the horizontal adjustment moves the lower corner.
Do not try to correct a badly misaligned window entirely through the hinges. If the frame itself has moved out of plumb, level, square, or plane, that underlying condition should be corrected first.
The Sash Has Dropped or Is Dragging
A common symptom is a sash that previously operated normally but now catches at the bottom, particularly near the handle-side corner.
A minor change may be corrected by raising the sash using the vertical adjustment at the lower hinge. Make small adjustments and check both the normal opening and tilt functions after each change.
However, repeated sagging can indicate something other than a simple hinge adjustment. Several possible causes of a sash that drops or drags include a frame that is out of square or twisted, sash misalignment, excessive locking pressure, or incorrect glazing-block position. The recommended approach is to confirm the frame and glazing support before continuing to adjust the hardware.
In other words, if you continually have to raise the sash again, the adjustment may be treating the symptom rather than the cause.
The Handle Is Hard to Turn, or the Window Is Difficult to Lock
A stiff handle does not always mean the handle or gearbox is defective.
One possible cause is excessive locking pressure. When the locking cams pull the sash too tightly against the frame, the handle can become increasingly difficult to move.
On uPVC tilt-and-turn systems, eccentric locking cams around the sash perimeter can be adjusted to change gasket compression. More compression creates a tighter seal, while less reduces operating resistance. Vetrina recommends making only small changes and checking handle effort, locking engagement, and gasket contact after each adjustment. Excessive compression can make the handle difficult to operate and unnecessarily load the hardware and gasket.
On aluminum systems, closing pressure may instead be adjusted by repositioning the locking keeper or strike plate. Each locking point should engage fully, and the handle should operate without excessive force.
Do not force a stiff handle. If reducing minor alignment or locking pressure does not correct the problem, the cause should be identified before additional force is applied.
The Window Is Stuck Between Tilt and Turn Positions
Tilt-and-turn windows include an anti-mishandling, or fail-safe, device designed to prevent the handle from being operated in the wrong sequence while the sash is open.
Occasionally, the sash can become partially disengaged from its normal operating sequence and appear to be open and tilted at the same time.
Vetrina's reset procedure:
Press and hold the anti-mishandling device located on the handle side of the sash and rotate the handle to the Tilt position.
While keeping the sash open, gently push the upper hinge-side corner back against the frame until it is correctly seated.
Continue holding the anti-mishandling device, rotate the handle to the Turn position, and then release the device.
Close the sash afterward and cycle the handle through the closed, turn, and tilt positions to confirm normal operation.
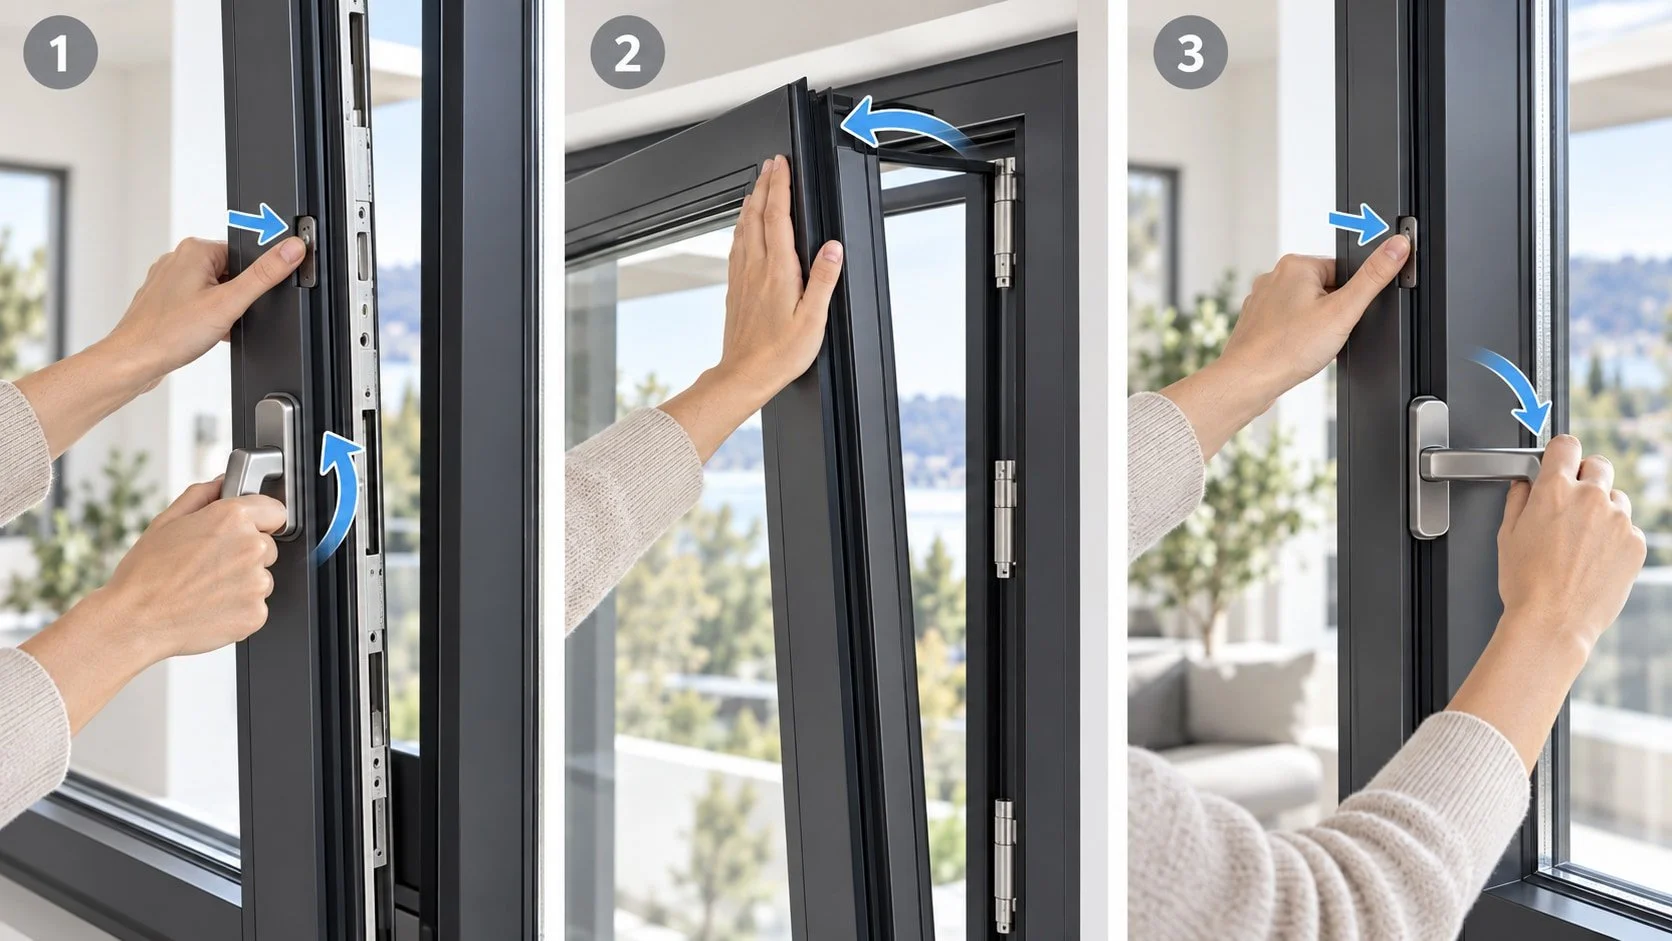
Misoperated tilt-and-turn sash reset procedure
If this happens repeatedly, do not simply keep resetting the window. Repeated misoperation can indicate sash binding, misalignment, or incorrect frame geometry that should be corrected.
The Opening Limiter Is Not Working Correctly
Many of our windows include an optional opening limiter, integrated friction brake, or both. These components perform different functions.
The opening limiter restricts how far the sash can open.
The friction brake slows the sash and reduces momentum and impact at the end of travel. Importantly, the friction brake is not intended to lock the window in intermediate positions. If a window continues moving slightly after you release it, that does not necessarily mean the brake is defective.
Where adjustable, the limiter should stop the sash at the intended position without binding the hardware or interfering with normal closing and locking.
Check Whether the Limiter Has Been Released
Some limiter configurations include a manual release so the sash can temporarily open beyond its normal limit for cleaning, maintenance, or exterior access.
If the limiter suddenly appears not to be restricting the opening, check whether this release has been left disengaged.
In many configurations, the threaded release cap can be removed to disable the limiting function. After using this feature, the limiter should be re-engaged and tested to confirm that the opening restriction has been restored.
Do not use the limiter or brake adjustment to compensate for a sash that already binds or operates poorly. Correct alignment and frame geometry first.
Air Is Leaking Around the Operable Sash
Air leakage around the sash can result from uneven gasket compression, a displaced or damaged gasket, misaligned locking points, or sash-to-frame misalignment.
A simple initial check is the paper test. Close the window with a strip of paper trapped between the sash and frame near the top and bottom of the locking side. There should be reasonably firm and similar resistance when pulling the paper from each location.
If one area has noticeably less resistance, inspect the gasket and locking-point engagement in that area.
Vetrina recommends checking the gasket condition and sash alignment first, then adjusting locking compression in small increments where appropriate.
Do not automatically make every locking point tighter. Too much compression can create the opposite problem by making the handle difficult to operate.
Water Is Appearing at the Lower Frame or Sill
Start by checking that the window's drainage paths and weep openings are clear and unobstructed. Drainage is one of the standard functional checks identified in the installation guide.
If the drainage openings are clear but water continues to appear at the lower frame, this may be due to several factors, such as sash alignment, glazing support, or lower-hinge adjustment issues. It is recommended to confirm the frame and sash geometry and check the glazing-block arrangement before relying on hardware adjustment alone.
Persistent water infiltration may therefore require more investigation than simply clearing a drain opening.
Condensation Is Between the Glass Panes
Moisture between the panes of an insulating glass unit is different from ordinary condensation on the room-side surface of the glass.
Condensation inside the sealed space between glass panes indicates loss of the insulating glass unit's edge seal, allowing moisture into the sealed airspace.
The appropriate correction is to replace the affected IGU, along with inspecting the glazing pocket and setting blocks for conditions that may have contributed to the failure.
Note that cleaning or adjusting the window hardware cannot correct this.
When to Stop Adjusting the Window
Minor hardware adjustments are normal, but repeated or increasingly large adjustments usually indicate that something else needs attention.
Stop troubleshooting and contact Vetrina if the sash requires more than minor alignment correction, repeatedly falls out of adjustment, the tilt-and-turn mechanism repeatedly needs to be reset, a handle or locking mechanism feels damaged rather than simply tight, a limiter or brake is physically damaged, the frame appears visibly twisted or out of square, or you see cracked, bent, or broken hardware.
Do not force the sash or handle to overcome resistance.
Need Help Troubleshooting a Window Unit?
If the problem remains after the basic checks above, contact Vetrina Windows and include:
Project or order information
Window position or unit number, if available
Window system or model, if known
A photo showing the complete window
Close-up photos of the affected hardware or area
A short description of where the sash binds or what the handle is doing
A short video showing the complete opening, closing, and locking cycle when possible
A video is especially useful for tilt-and-turn problems because it lets our team see the sash position and handle sequence when the issue occurs.